Automated Laboratory Complex “Operational Processes of Passenger Car Suspensions”
January 12, 2025
Cargo Elevator Inside Building, 1000 kg/Elevator Control Station with Two-Speed Drive
January 12, 20253D Wheel Alignment Stand, 4-Post
$3,037.00
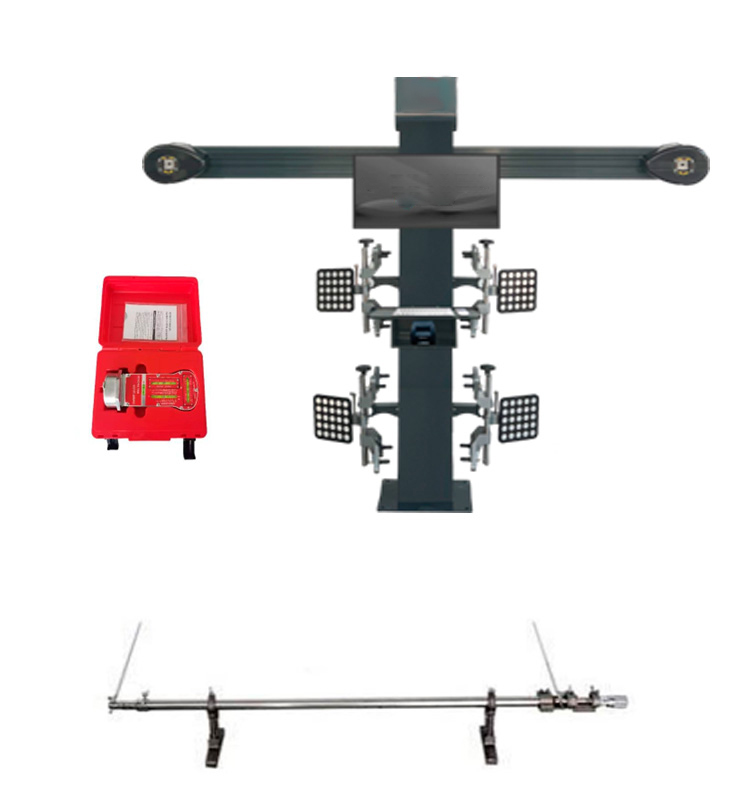
This stand offers a platform for 3D wheel alignment procedures on vehicles. Users can practice precise alignment techniques to ensure optimal vehicle handling and tire wear.
SKU: LLS-AM-2106
Categories: Automotive, Laboratory stands
3D Wheel Alignment
Features
- Intelligent data analysis, prompting problems such as tire wear, deviation, and misaligned steering wheel.
- Automatic clamp compensation function, the first in the industry. Solves the problem of wasting time when removing the hub cover.
- 3D field of view is adjustable to solve the problem of overlong, overwide, and overnarrow models.
- In addition to supporting conventional dynamic cart measurement, it also supports two dynamic measurement methods: rotating tire measurement, rotation, and target measurement, to solve the problem that the lift is not long enough to push the car.
- It can measure more than ten angles, including toe-in, camber, kingpin castor, kingpin inclination, wheelbase, track, thrust angle, diagonal distance between two wheels, setback angle, axle runout, and wheel runout. Provides the master with more angle references, making it a true chassis maintenance expert.
- Standard configuration:
- 1 crossbeam
- 1 column
- 4 four-wheel clamps
- 1 steering wheel holder
- 1 brake holder
- 1 32-inch monitor
- 1 keyboard and mouse set
- 1 standard printer
- 1 sheet metal cap
Technical parameters
The camera system uses a 5-megapixel high-definition pixel camera.
Measurement range and accuracy:
| Parameter | Measurement Accuracy | Measurement Range |
| Camber angle | ±0.01° | ±8° |
| Cast angle | ±0.03° | ±19° |
| Front wheel inclination angle | ±0.02° | ±19° |
| Toe-in | ±0.01° | ±2° |
| Rear wheel thrust angle | ±0.02° | ±2° |
| Rear wheel axle runout | ±0.02° | ±2° |
| Wheel width difference | ±0.02° | ±2° |
| Front setback angle | ±0.02° | ±2° |
| Rear setback angle | ±0.02° | ±2° |
| Wheel width | ±0.64 cm | <265 cm |
| Wheelbase | ±0.64 cm | <533 cm |
Car Front Wheel Inclination Aligner
Product Introduction:
- Rugged magnetic gauge mounted on the wheel/hub to quickly and accurately measure camber, caster angle and kingpin inclination.
- Fixed scale of camber gauge from +5 to -5.
- Adjustable camber gauge with scale from +11 to -3.
- Kingpin gauge with scale from 0 to 14 from left to right.
- Only suitable for vehicles with steel wheels.
- For use with steering turntable and rear wheel leveling plate.
- Outer packaging size: about 255×220×110 mm
- Product weight: about 1.6 kg
Automobile Toe Gauge
Product Introduction:
- The automobile toe gauge consists of a slide, a ruler, a bracket, a probe, etc.
- One end of the slide is connected to the spiral scale wheel, and the other end is telescopic in the ruler.
- It can adjust and measure the basic size of the front wheel of the car. The measuring range is adjustable from 1.0 meters to 2.0 meters. It is well-made, simple to operate, has high measurement accuracy, is sturdy and durable, and is suitable for the detection and repair of various automobile toes.
- In order to maintain the appropriate toe value of the front wheel, four-wheel alignment is required regularly, but since the measurement and adjustment of the toe of the front wheel are relatively simple, as long as you are willing to do it, you can complete the measurement and adjustment of the toe of the front wheel without a special four-wheel alignment instrument.
Technical Data:
- Packing size: about 1260 mm × 150 mm × 65 mm (length × width × height)
- Toe value indication range: ±15 mm
- Measuring range: 1100 mm ~ 2000 mm
- Accuracy: 0.1 mm
- Weight: about 1.5 kg


